2009/11/23
When I had my dreadlocks made, I had little idea how to take care of them. I tried different things. By now, I have a routine. I wash the dreadlocks with water every morning and after sports. Once a week, I wash them with non-silicone shampoo, twice at a time, and rinse carefully to make sure there will be no residual shampoo left in my hair at the end. Additionally, I spend on average maybe 10 minutes a day fixing them using a tool that I devised:
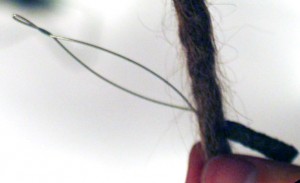
The tool is simply a metal wire loop with a handle. It works like this:
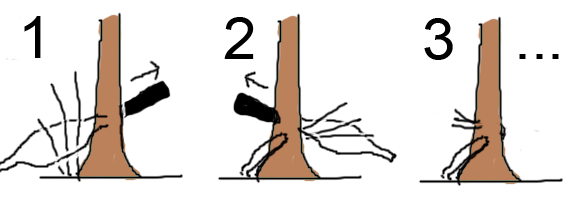
The above cartoon misses a couple of important points: When you push the loop through the dread, make sure it comes out at the same spot as does the loose hair, so that you won't be leaving funny loops of hair on the surface of the dread. Also, hold on to the end of the bunch of loose hair with fingers, while you are pulling the tool through the dread. It takes a bit of force to pull the hairs from your grasp, resulting in a tighter weave.
Instructions for building the dread tool
Go to your local guitar store and ask for the thickest electric guitar string that they have that is a simple metal wire, not a wound string. You can tell them you will use it as metal wire for non-musical purposes. If you have access to stainless MIG welding wire, that will also do. Normal iron wire is too soft, don't waste your time with it. Guitar string that I have used were 0.4 mm (26 gauge) and 0.56 mm.
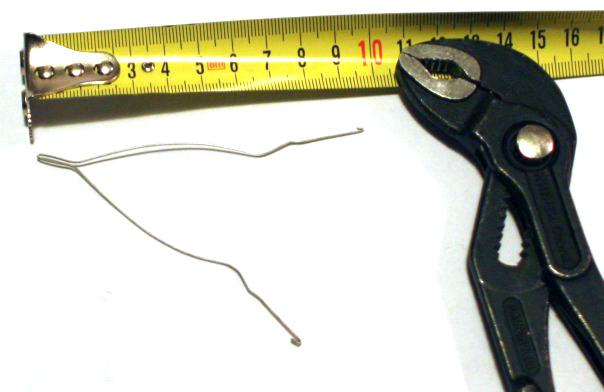
Cut a 20 cm piece of the wire. Fold it like this:
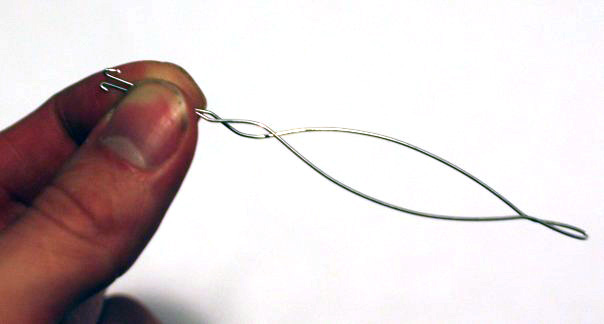
It should look like this when the two ends are held together:
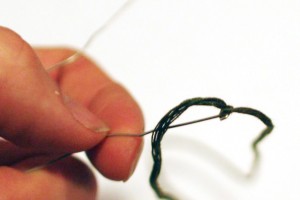
Tie a cotton string to it:
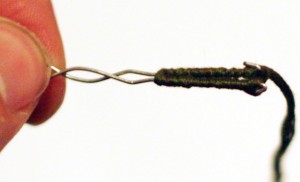
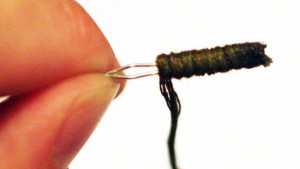
The cotton string will form a handle on the straight parts of the wire ends. Cut off the loose end and wind the cotton string around the straight part of one end of the wire, then continue winding it around the other, so that the two are pulled together.
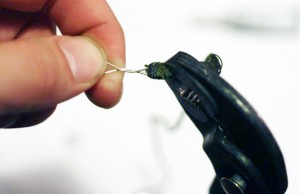
Hide the protruding wire tips by flattening the small hooks at the tips using pliers. Apply some super glue on the wound part of the cotton string, and wind the cotton string around the whole handle:
Quickly apply another layer of super glue, wrap the string once more around the handle, and squeeze the handle with pliers to flatten it. This will be of help when you use the tool as you will know its orientation by touch alone.
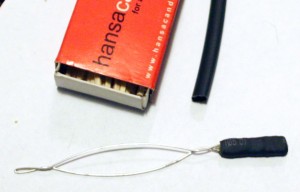
Apply super glue once more on the shaped handle. When the glue is dry, cut off the excess cotton string. Now the tool should look like this:
Apply some contact glue on the handle, and fit a piece of heat-shrink tube on it, making a nice rubber-coated handle. You can leave a bit of an overhang (1 cm or so, not shown in picture below) to make the tip of the handle feel less sharp against your palm when you push it through the dread.
Now the tool is ready.
Another way to make the handle is to bury the thread (this time red) in a lump of 2-component epoxy:
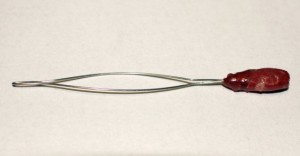
When the epoxy has solidified, you can use sandpaper to get rid of any irregularities. I like this better than the shrink-wrap handle! I'm also making the tool a bit shorter now, so that it fits in my wallet. Make sure the end of the handle is round and smooth, with no metal sticking out, so it won't sting against your palm when you use it.

