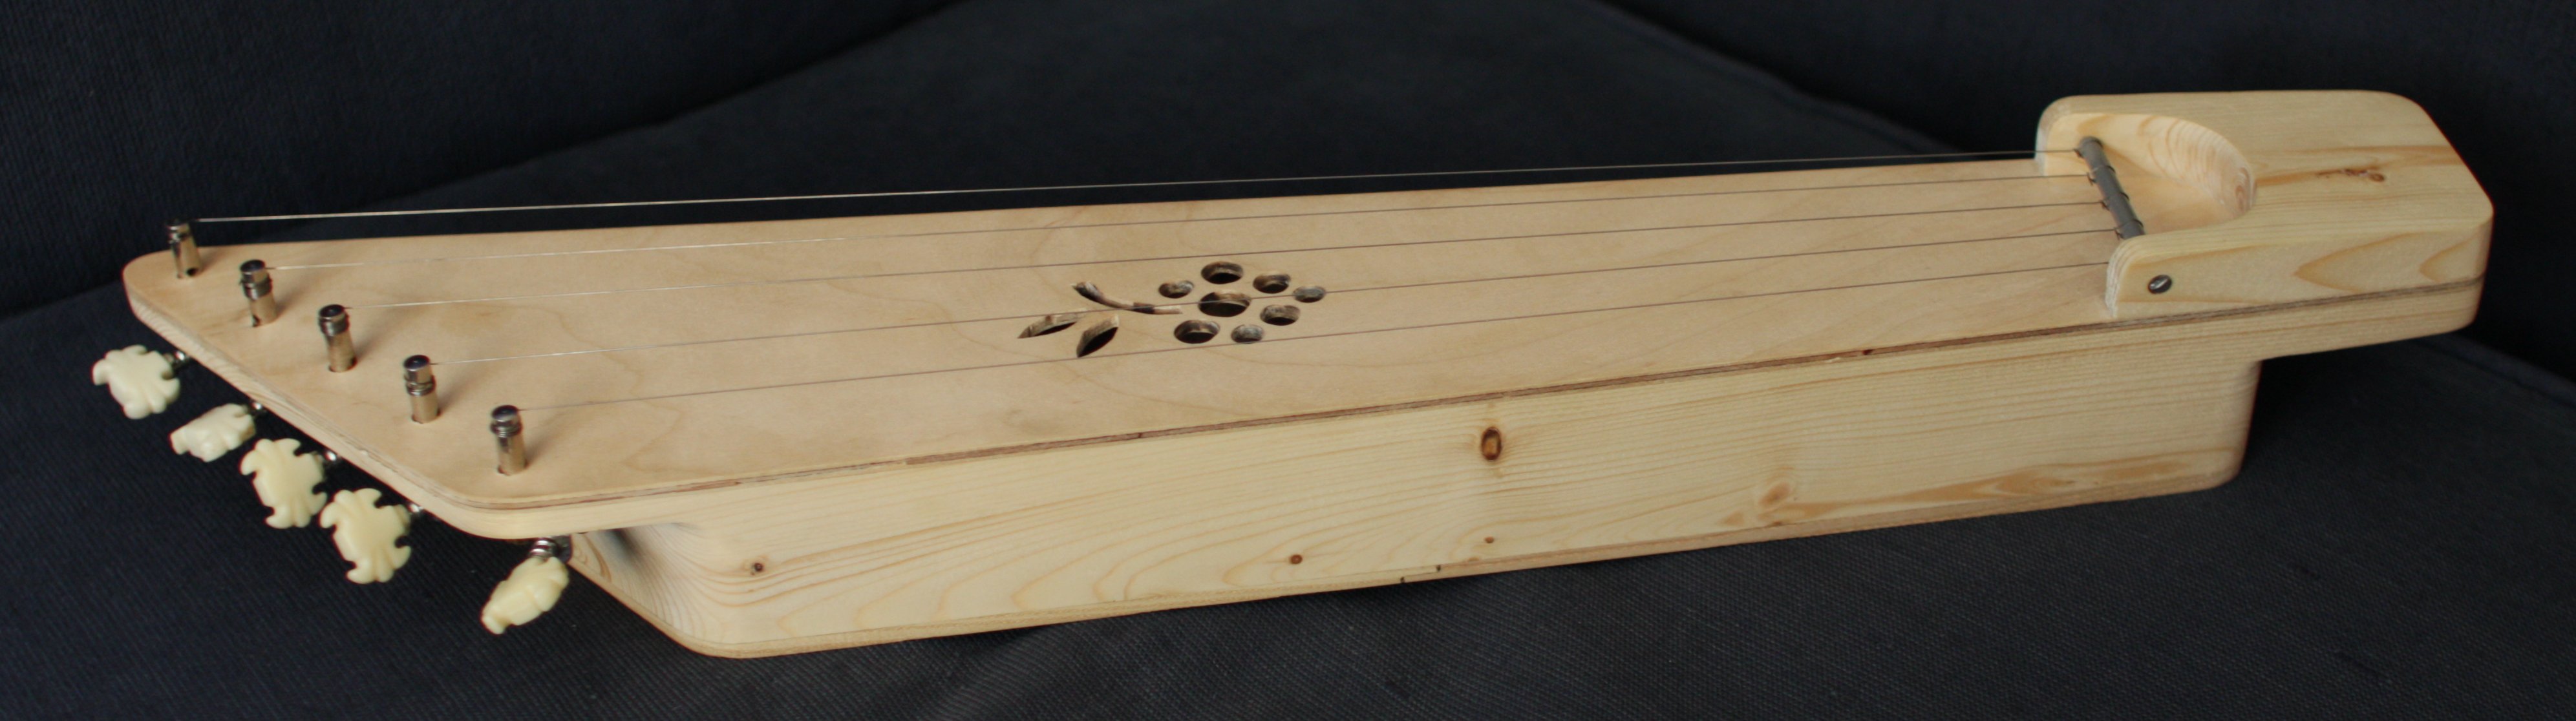
These are building instructions for a modern variant of a 5-string kantele, a traditional Finnish folk-musical instrument. Raw sound samples of the instrument (download for higher fidelity):

I built a kantele for my Russian friend Dmitry, who during his visit lusted after the rather crude but acceptable-sounding kantele I had built as a kid at school, under supervision of my then teacher Unto Kukka. In January 2015 I played the original kantele in an Aura Shining Green performance:
In addition to "narujakkara" (rope chair), it was the only useful object that I had made at school. For the new kantele, which inherited the basic form of the old one, I did not take pictures of the building process (stupid me!) so I'll draw some diagrams instead.
Kantele being a folk instrument means that you can make it your own, and you can use pretty much whatever materials you have available. I like to think that there's no wrong in the construction or playing of folk instruments. Kantele has no fingerboard so the dimensions are not critical.

For the woodwork, I used these tools and a bench drill (bits shown):

This kantele consists of four wooden parts that are glued together using wood glue:

Body (B)
For the body (B), I used a piece of 48 mm x 123 mm structural whitewood timber I found from the thrash. This was sawed to a rough shape and hollowed using a bench drill. At this point, correct any defects like branch holes (you can glue a wooden stop in place of a cracked branch). The insides were finished using a sharp knife and a hand-held sander with rough sandpaper. Make the body as thin as you dare, as also the sides will vibrate. You'll be surprised how light-weight the body is after it is ready; there's not much wood left in it.

Make sure that the body is flat, by setting it on a flat table. If you see irregularities, you can use a planer to smooth them out. The planer doesn't bite too much and cause splintering if you always work the planer the same way as the grain rises. This way it doesn't follow the grain deeper into the wood.
Top (C) and bottom (A)
A good material for the top (C) and the bottom (A) is 3 mm thick 3-layer plywood. The material should not "eat" vibrations (like rubber or fiberboard) or be too heavy (like metal). Use especially for the top as thin a material as you dare. Using thinner materials improves the sound but makes the instrument more fragile. The bottom is not as critical as it will anyway rest against the legs of the player, or against a table/floor. I used two pieces of solid wood glued together for the bottom, as that was available to me.
Use the unfinished body (B) to draw the shape of the top and the bottom on plywood (or whatever material you will be using). Make both 0.5 cm larger from all sides than the body so that there is some headroom for splintering during sawing of the plywood. Make a sound hole somewhere in the middle of the top (C). I used a high-speed rotary tool and abrasive bits to effectively burn the decorative sound hole, and used a sharp knife for finishing.
To glue the top and the bottom in place, use wood glue and clamp the three pieces (A, B, and C) between two wooden boards (not too thick, say 1-2 cm). It is best to have at least 12 small-to-medium-sized bar clamps available. The protrusions at the ends of the kantele will need to be clamped separately as there is an air gap between the body and the bottom-side board.
When the glue is dry, shape the piece using a hand-held planer and an electric sander with rough sandpaper. Don't use too rough sandpaper on the top and the bottom as it will take a lot of work to remove the scratches, and the plywood should be quite smooth to begin with. Be liberal in the way you work the piece, the shaping you do here will give your craftman's signature to the piece.
Ponsi (D)
To make the ponsi (D), you can use leftover wood from the body. When the shape of the kantele is almost finished except for the ponsi, you can draw the outline of the ponsi onto a piece of wood. Use your own judgement on the shape. The ponsi should be at least 1.5 cm thick where the metal bar (for attaching the strings) goes through it. I used a high-speed rotary tool with an abrasive bit to make the hole for the metal bar. Make sure the gluing surface is flat so that it mates well with the top (C), and glue the ponsi in place. Finish the shape of the kantele using gradually smoother sandpaper. Push a round metal bar into the ponsi. The rod should be strong enough that it doesn't bend from the tension of the strings.
Tuning mechanism
Instead of tuning pegs, I prefer geared machine heads intended for guitars. These are easier to adjust and you don't need to carry around a key with the kantele. Note that half of guitar machine heads tighten the string to the opposite direction, but it may be possible to modify them if you want the tuning direction to be the same for all strings. The string height should be 1 cm or more from the top surface. Distribute the strings pegs evenly, or if different strings are tightened to different directions make sure that the strings will be distributed evenly. Use a bench drill to make straight holes for the tuning pegs. Be careful when drilling, I damaged my kantele a bit at this step. Use gradually larger bits and hold down the kantele securely. Drill from top to bottom and have a piece of wood underneath the part you drill so that the wood of the kantele doesn't splinter when the bit comes out of it. When youre done, screw the machine heads in place.
Coating
I left the paint work to be done by Dmitry and his wife. Some sort of coating is needed to avoid cumulative staining of the wood by touch. Remove the metal parts before applying the coating.
Strings, tuning and playing
0.2 mm to 0.5 mm metal wire can be used for the strings. For this kantele, because the string lengths are not that different, I would recommend a succession of different thicknesses between those values, to increase the attainable frequency range. My opinion is, tune your kantele in any way that pleases you. It is quite a meditative instrument that you can also play just for your own pleasure. Just keep the notes in order, with the lowest one starting at the longest string. Note that the glue needs a couple of days before the tone of the kantele matures.
